
Overview
This guide will breakdown how the Magic Link API works and help you understand how to authenticate users.
How do Magic Link API work?
Conceptually, Magic Links work quite simply in 3 steps.
- Generate a pre-authenticated Magic Link strongly tied to a user
- Allow the user to access Magic Link through a communication channel such as Email
- Verify the Magic Link and authenticate the user
Since Magic Links themselves do not have a standard to go by, hence there are different ways for it to be implemented. This also means they become prone to errors when attempting to implement on the fly.
Here, we will explain how using Magic Links with EZiD APIs work.
Step 1: Send Magic Link email to user
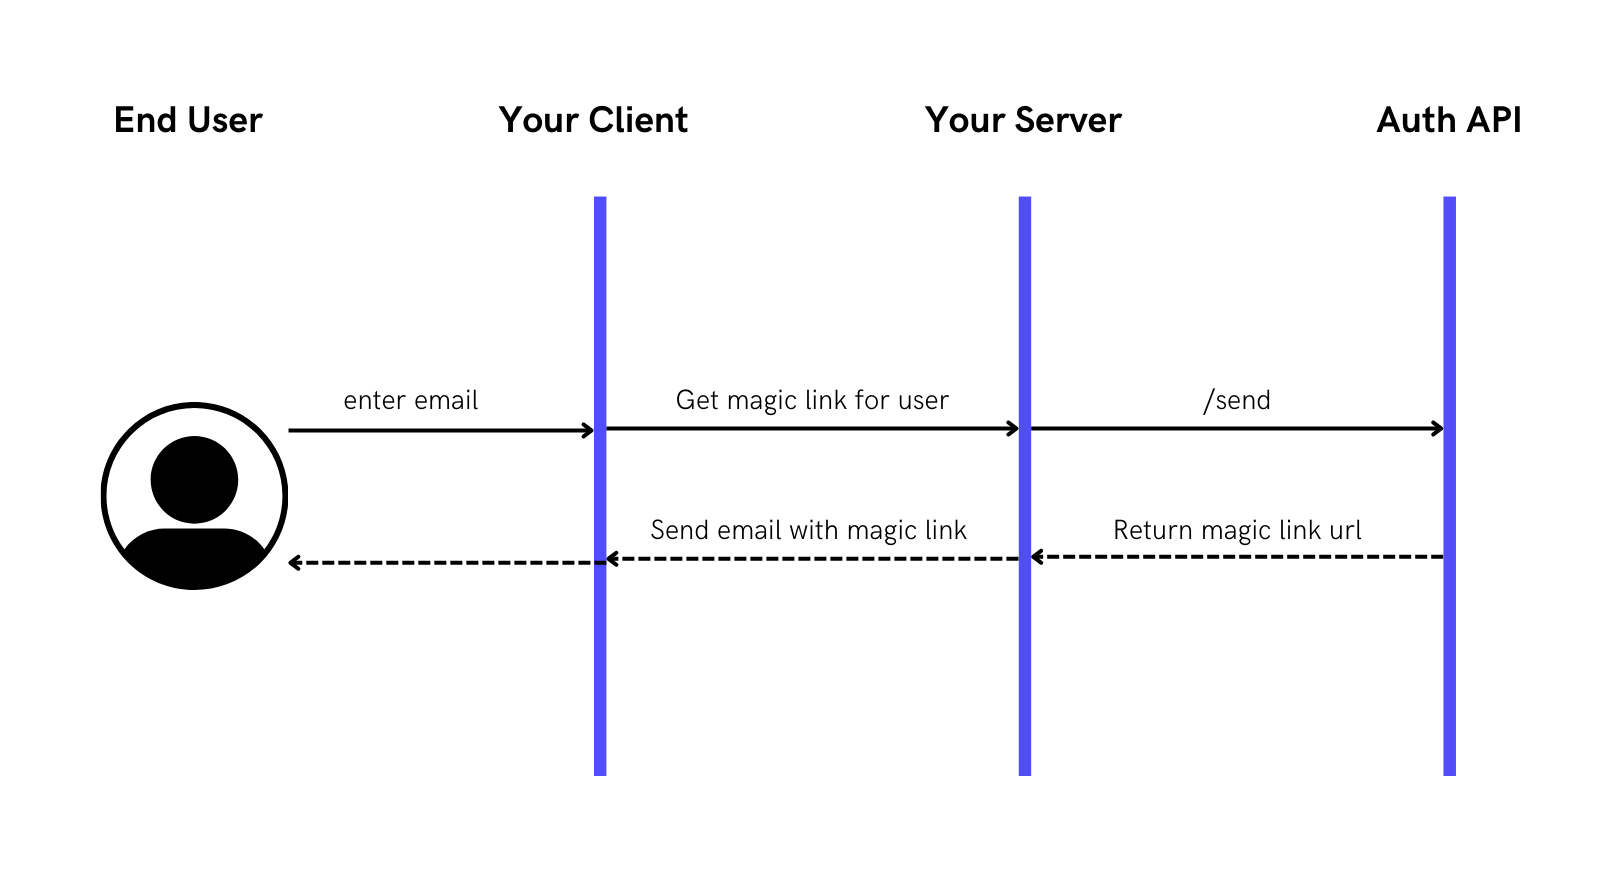
Here, we use the /send API to send an embedded magic link to a user through the email channel with a single API.
The Magic Link URL has a format of https://<your domain host>/auth?code=<auth code>. The auth code can be embedded in a JSON Web Token (JWT) so that the recipient can verify that the code hasn’t been tampered with.
Step 2: Verify Magic Link when clicked on and authenticate user
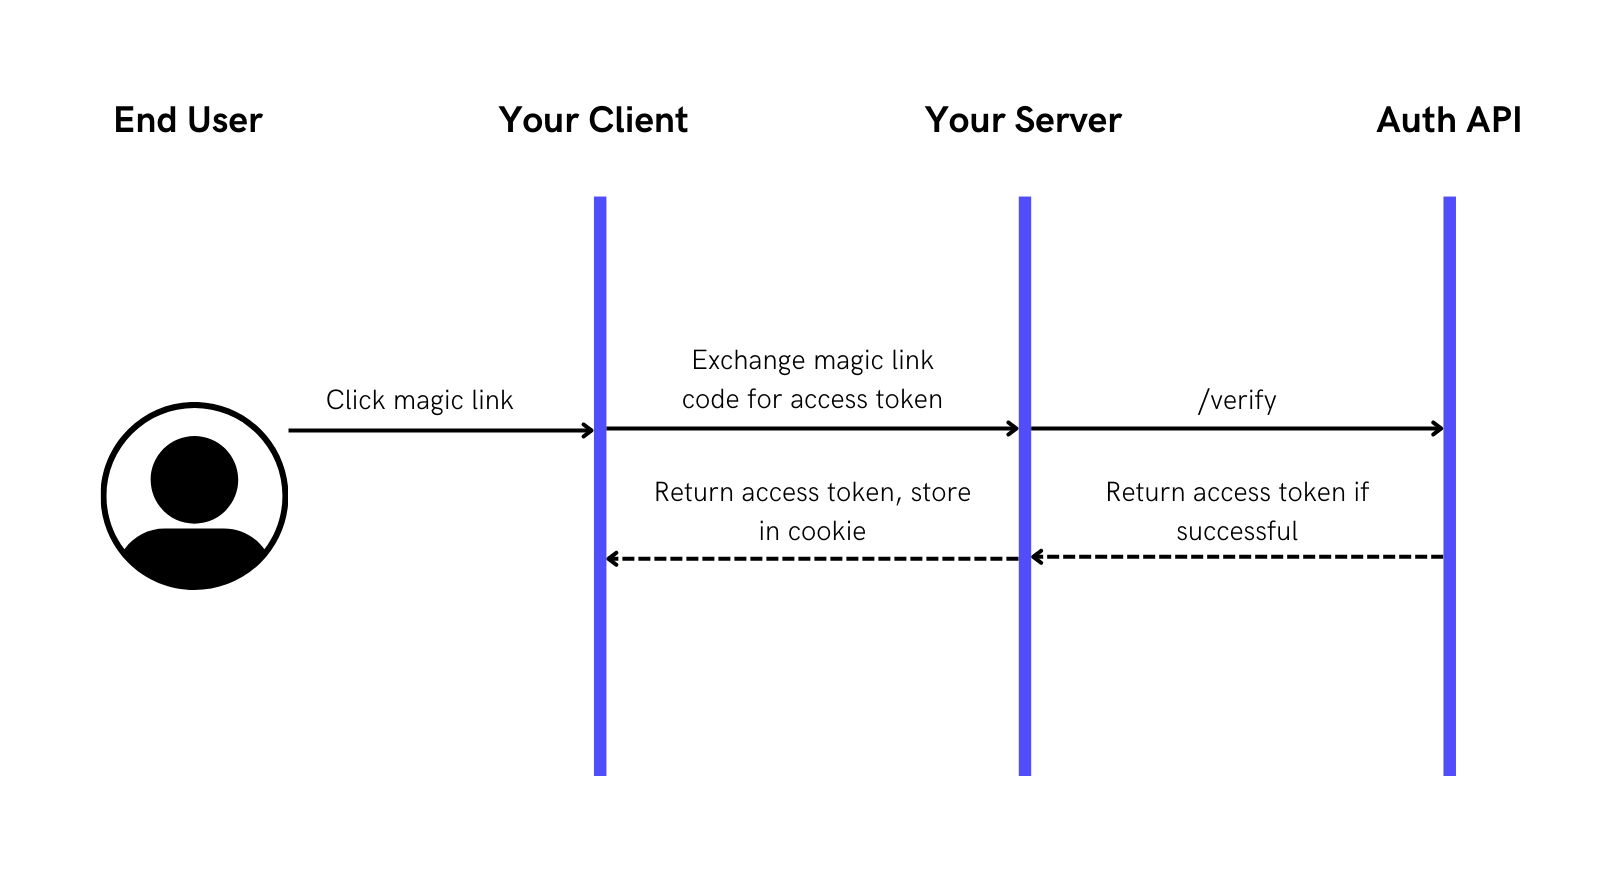
Here the Magic Link has an auth_code that your server can exchange for an **access_token**.
There are a few reasons as to why the access_token is not directly provided in the Magic Link:
- The Magic Link needs to be single-use for security reasons and the
access_tokenis not. - You also do not want the
access_tokenin the URL which can be prone to sniffing. - Lastly, the
client_secretthat you will need to access the Auth API should be protected on the server-side. Then by passing theaccess_tokento the server, your server can then use theclient_secretto exchange that for theaccess_token.
Please Note: The Auth API can send the Magic Link email directly to the user or your server can choose to send this depending on which email service you want to use.
Step 3: Use access_token from authenticated user to access app resources
access_token from authenticated user to access app resources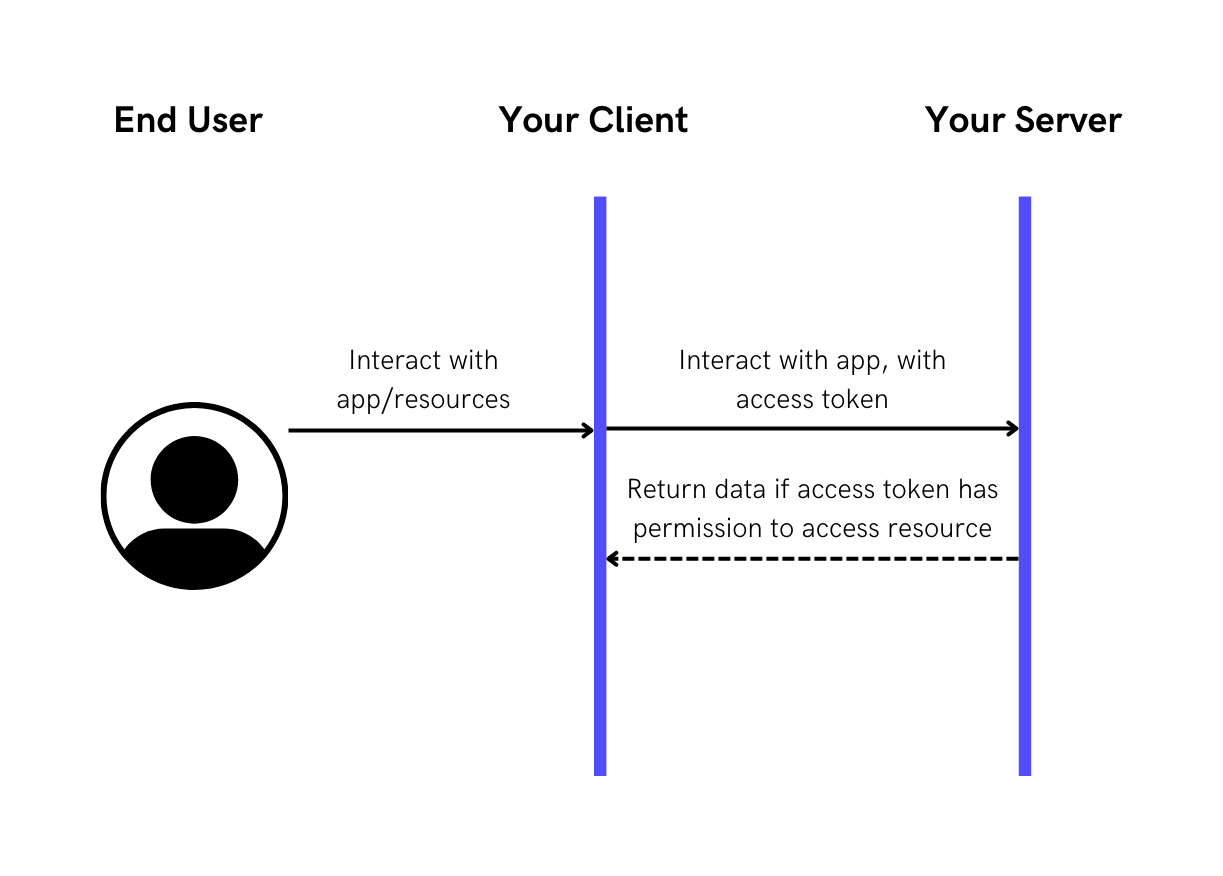
Now that your user has an access_token, they can use this to access resources as specified in claims (assertions about the user that would allow them to access parts of your application) that is now embedded with the access_token.
Please Note: If you are using NodeJS, a handy package to decode and verify JWT tokens is jsonwebtoken